In this course we’ll learn how to develop an application programming interface (API) using node.js and express. The server will primarily accept CRUD requests from client applications allowing users of the client to create, read, update, and delete records (partial or whole) in a NoSQL database.
Before we begin writing code we’ll need to download and install a number of software packages onto our laptop and create a number of online accounts to give us access to various online services. If you’ve already installed some of the applications discussed below, please read the sections anyway. Some software requires extensions and updates.
Software
-
Git
Git is a tool developed by the inventor of Linux, Linus Torvalds, that allows us to archive our code locally on our laptops in repositories and copy the repositories from our laptops to other online services like GitHub.com.
To get Git, follow the instructions in the Get Git tutorial.
We need to configure Git so that it knows our identity and we need to change the default branch name that Git uses from ‘master’ to ‘main’. If you’ve used Git on your laptops prior to this course you may have already configured Git to know your identity so you don’t have to do it again, but you not have changed the default branch name.
Please use the instructions in the git-scm.com tutorial named 1.6 Getting Started – First-Time Git Setup to set up your identity (if you haven’t already) and change the default branch name from master to main. Note: you only have to perform the instructions in the sections titled Your Identity, Your default branch name, and Checking Your Settings. You should use your full name when setting user.name, but can use any valid email address when setting user.email.
If you haven’t already, run the following command to verify your Git config settings.
$ git config –list
-
Python
Some of the Node.js modules that we’ll download and use in our applications are written in Python, therefore we need to install Python on our laptops.
Please navigate your browser to python.org/downloads/, download the appropriate installer for the latest version of Python, and run the installer.
After you’ve installed Python, run the following command in your terminal application. You should see the version number.
$ python3 --version
If you get an error stating that python3 does not exist, try the following command.
$ python --version
-
Node.js (and npm)
If you’ve developed Java programs, you’re familiar with using a Java Runtime Environment (JRE), for example using java on the command line, to run the Java programs that you’ve written. Node.js is analogous to a JRE. Node.JS is a runtime application that runs JavaScript programs. In this course we will develop internet applications in JavaScript and use Node.js to run them.
Navigate a browser to the Node.js website at nodejs.org, download the installer for the Current version, and run the installer. If you already have node.js on your laptop, search the internet for instructions on how to update node.js for your platform and update node.js.
After you’ve installed Node.js, run the following command in your terminal app. You should see the version number of node that you’ve installed.
$ node -v
If you already have node installed on your computer, follow the instruction in this stackoverflow post to upgrade node.
Update npm
The Node.js installer, also installs a program named npm which stands for Node Package Manager. We will use npm to install packages (i.e. libraries) into our application work space for our applications to use. Run the following command in your terminal to verify that npm is installed. You should see the version of npm that is installed on your laptop.
$ npm -v
$ npm install npm@latest -g
-
Visual Studio Code
Visual Studio Code (VSC) is a code editor that includes many extensions that will be helpful in developing and deploying our application.
Navigate to code.visualstudio.com/, download the appropriate installer, and run the installer.
Next, navigate your browser to this webpage and install the Node.js Extension Pack for Visual Studio Code.
-
Postman
Web applications typically have two main components, a frontend (client) component that runs in a browser and a backend (server) component. Postman is a program that we can use to test the API server we construct, without having to build a client. With Postman we can send requests to the API server and view the responses that the server returns.
Before downloading the Postman app, navigate a browser to identity.getpostman.com/signup and create a Postman account.
Then install Postman by navigating a browser to www.postman.com/downloads, downloading the appropriate app, and installing it.
-
MongoDB Compass
MongoDB Compass is an application that we can use to view and modify the contents of a MongoDB database.
Navigate a browser to www.mongodb.com/products/tools/compass, download the Compass installer, and run the installer.
Online Services
-
Github.com
Github.com is a web app that allows users to store files in Git repositories among many other things. Navigate to the site and create an account.
SSH is a communication protocol that can be used to securely copy data from one server to another. In order to communicate with GitHub we are required to use SSH. Before we do so we need to provide GitHub with an encrypted public key. Please follow the instructions in the Provide GitHub with a SSH Key tutorial.
-
MongoDB Atlas
MongoDB Atlas is web application and hosting platform that allows us to create, configure, view, and modify MongoDB databases that are hosted on Altas servers. We’ll use the mongoose library in our API server to, among other things, communicate with our MongoDB database that is hosted on Altas.
Navigate to www.mongodb.com/atlas and Sign up for a new account. After you’ve created an account, MongoDB will send you a verification email. Please verify your email by clicking the link in the email.
After verifying your email you will be directed to a page that asks you how you will use their services. Enter in data similar to what is shown in the screenshot below and press Finish.
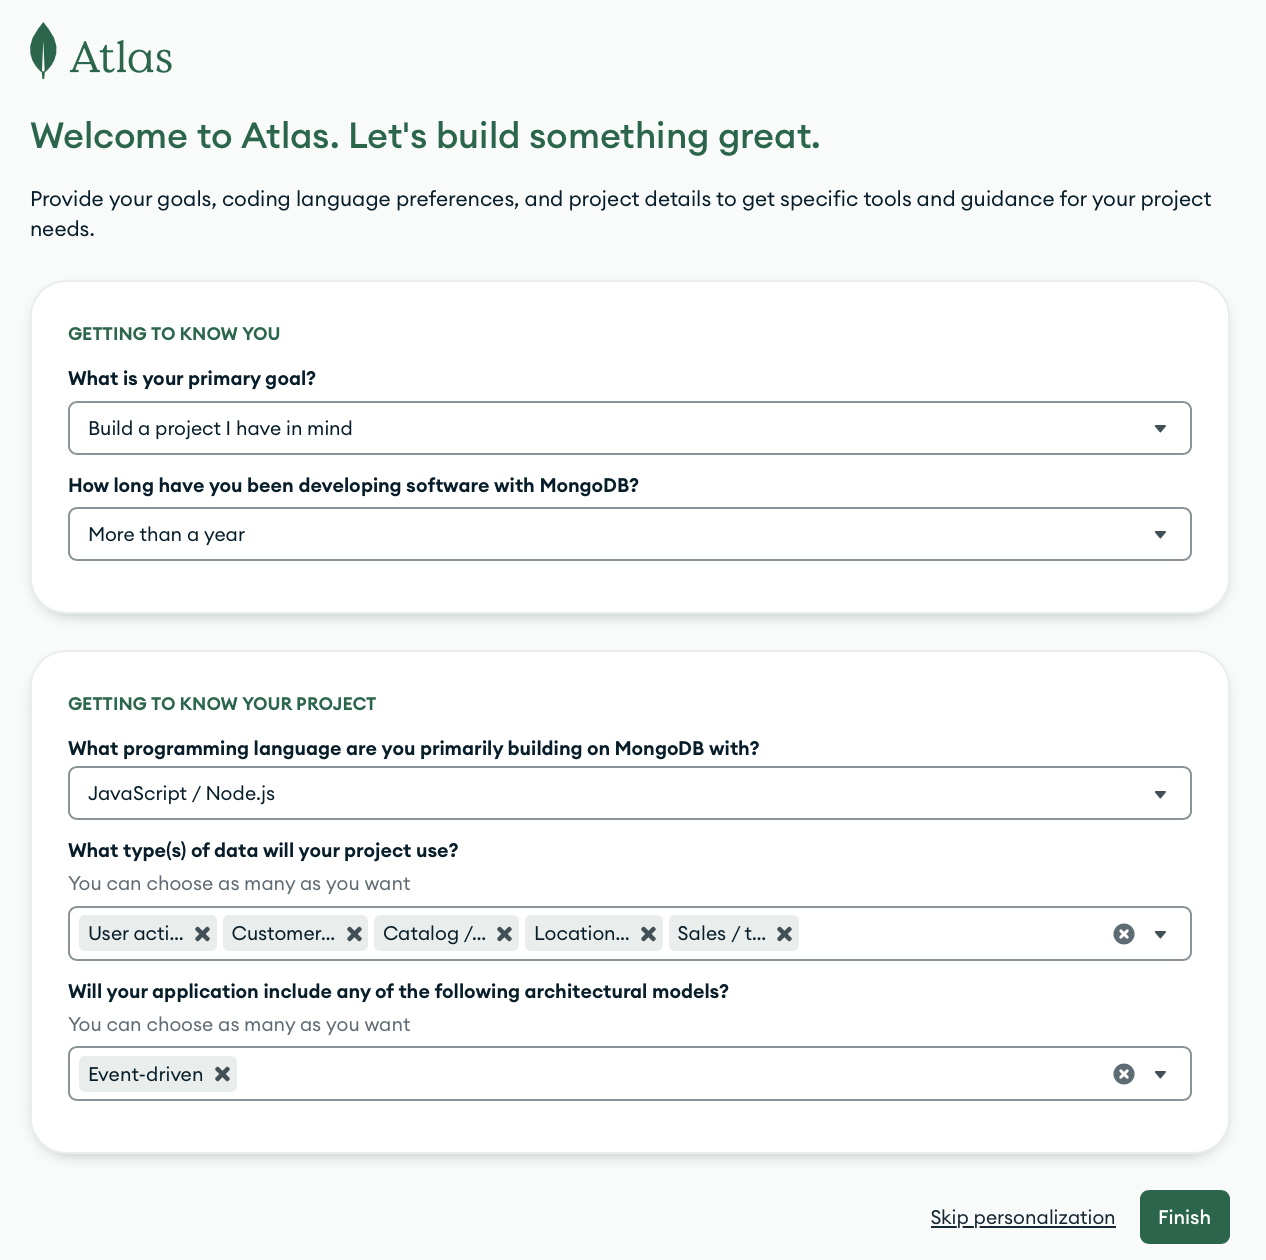
You’ll then be directed to a page titled Deploy your cluster. Click the button labelled I’ll do this later.
-
CloudFlare
When a user tries to create an account in a web app, the app should attempt to detect if the user is a human or a bot. Cloudflare provides a human/bot detection service called turnstile that we’ll integrate into our test client and API server.
Navigate to https://www.cloudflare.com/application-services/products/turnstile/ and click the Get started for free button. On the next page, fill out the form and press the Sign up button.
-
Sendgrid
When a user creates an account in the web app that utilizes our API server, they will provide an email address. Our API server will send an email to the email address provided by the user using Sendgrid’s email service.
Navigate to https://sendgrid.com/en-us and click the Start for free button to create a Twillio (owner of Sendgrid) account.
-
DigitalOcean
In the next tutorial we’ll begin writing the code for our API server. When the server is running our personal computers we’ll be able to test the server using Postman on our localhost IP address.
When we want to allow someone (or a web app) on the internet to access the API server we need to provide that user (someone or a web app) a unique IP address. To facilitate this we’ll deploy our API servers on a Digital Ocean server and Digital Ocean will provide us a unique domain name that their DNS maps to a unique IP address.
Navigate a browser to https://www.digitalocean.com/ and click the Sign up button to create an account.